Python tools for Windows forensics: Extracting a user’s Google Chrome history

Web browsing data can tell an analyst a lot about what happened on a system before they got their hands on it. Here’s how to extract the history of the most popular browser – Google Chrome – with a new Python module for our forensics tool.
What is the Chrome history and how does it help our investigation?
I don’t expect this one requires much introduction, but the Chrome history is a database that contains details of all the user’s non-Incognito browsing activity using Google’s web browser, including page titles, URLs, timestamps, and the way the user visited the page (e.g. clicking a link versus typing a URL).
The data returned by this module’s function will be extremely useful for an examiner, detailing exactly what a user did online and offering clues as to whether they uploaded company data, were planning a trip to a certain location, visited illegal material, or did anything else that might be relevant to the case.
Setting things up
As with the other MCAS Windows Forensic Gatherer modules, the code that fetches and parses the Google Chrome history will sit in its own function and will be called by the main script. The first step is the initial setup, importing the variables we’ll be using and compiling the correct path.
global windows_drive
global username
database_file = windows_drive + ":\Users\\" + username + "\AppData\Local\Google\Chrome\User Data\Default\History"
print "Accessing Google Chrome browsing history."
To achieve this, the global variables windows_drive and username are imported and used to piece together the path to the Chrome History database. As usual, we write an update to the screen.
Opening the Google Chrome history database
Now we know where we’re looking, it’s time to open the Google Chrome history database, which is stored in the SQLite format. Once we’re inside, we want to select everything from the urls table – check my series on SQL if you want pointers on constructing other SQL queries.
db = sqlite3.connect(database_file)
cursor = db.cursor()
cursor.execute("SELECT * from urls")
browsing_data = (cursor.fetchall())
for record in browsing_data:
As you can see above, the SQL query here is SELECT * from urls, which will return every field of every record in the table. Next, we begin iterating through the records one by one for processing.
Converting the timestamps
Before we start digging into the URLs, we need to convert Google Chrome’s timestamps, which are stored in the sixth column (record[5]) as the number of microseconds since January 1st 1601.
visit_time = str(datetime.datetime(1601,1,1) + datetime.timedelta(microseconds=record[5]))
    if visit_time[:4] == "1601":
        pass
    else:
        visit_time = str(datetime.datetime.strptime(visit_time, "%Y-%m-%d %H:%M:%S.%f"))
        visit_time = visit_time[:-7]
Some records – from my data they look to be some of my bookmarks – have a timestamp value of zero and therefore appear to have been visited in 1601. These may be useful for other analysis, but I’m excluding them for our purposes to focus on the browsing history records.
When we’ve established that a record has a genuine timestamp, we convert the timestamp into a string that will play nicely with our forensic timeline, removing the milliseconds from the end.
Extracting the page title and visit URL
Now that we’re sure that the record in memory is one we’re interested in, the next step is to extract the page title and URL for inclusion in our master forensic timeline.
		printable = set(string.printable)
        visit_title = filter (lambda x: x in printable, record[2])
        visit_title = visit_title.replace(",","")
        visit_url = record[1]
The page title is stored in the third column (record[2]). This field requires sanitisation – we remove any commas present to avoid accidental column breaks in our CSV output. The visit URL is much simpler, and can be extracted straight from record[1] without any extra formatting.
Writing the results to the CSV timeline
That’s all the data we need, so the final job of the Google Chrome history module is to assemble it into a line that matches our timeline and append it to the output CSV file.
visit_line = visit_time + "," + "Website visited (Chrome)" + "," + "\"" + visit_title + "\"" + "," + "\"" + visit_url + "\"" + "," + username + "," + "," + "," + visit_time + "," + "," + "Google Chrome history" + "," + "History" + "\n"
        timeline_csv.write(visit_line)
print "Google Chrome browsing history gathered."
print ""
We combine the visit timestamp, page title, and URL into a string and insert commas in the correct places to match the pre-existing columns before writing it to the file. All that’s left to do afterwards is to inform the analyst that we’ve successfully gathered the Google Chrome browsing history data.
The output
So what did we get? If we filter our master forensic timeline, we’ll see that we now have a bundle of neatly-formatted Google Chrome history lines showing exactly what the user was doing online.
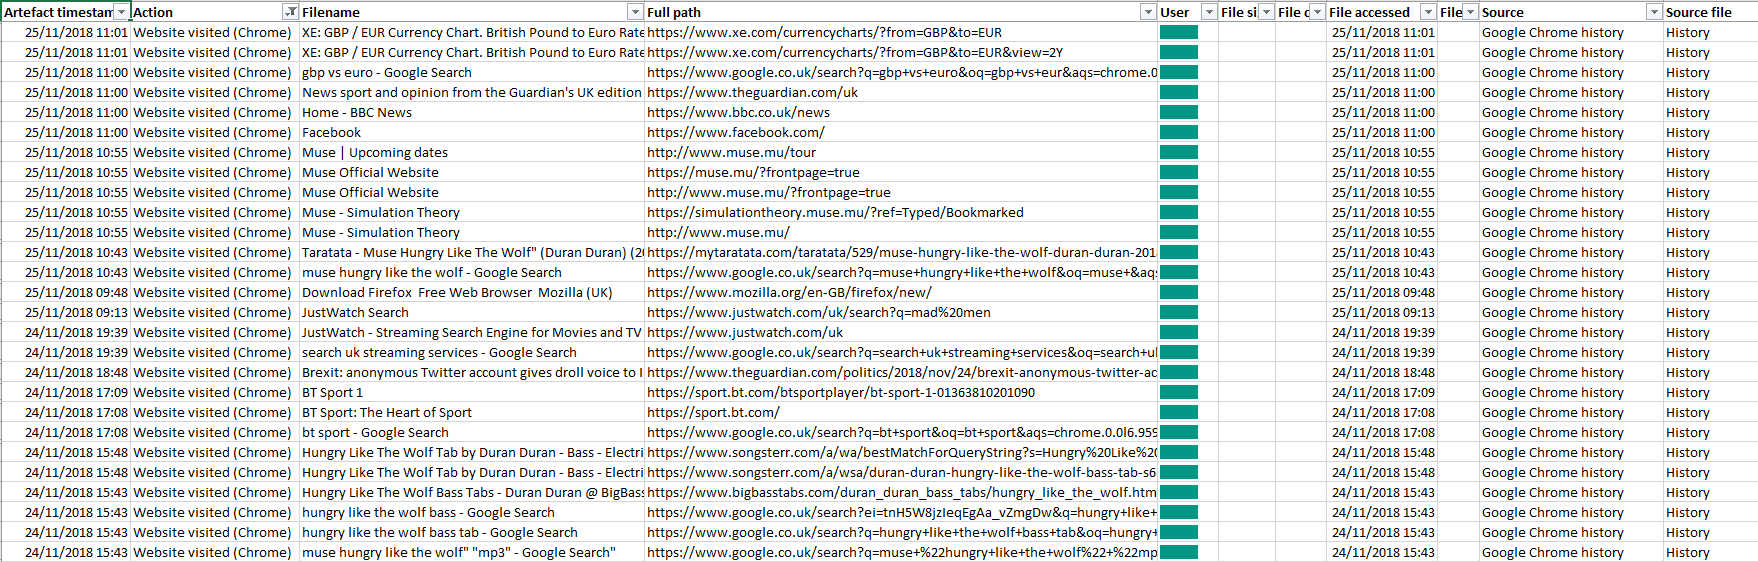
We’re amassing quite a number of artefacts. The MCAS Windows Forensic Gatherer can now parse Prefetch data, gather information on deleted files from the Recycle Bin, find out when a user logged on and logged off, and tell us what they looked at in Google Chrome.
Next month, we’ll take a look at how to tell which files were recently opened using Microsoft Office. Until then, head to the MCAS Windows Forensic Gatherer page if you missed any other posts in the series.
Photo from Kaboompics.com on Pexels